Thanks for entering everyone!

Thanks for entering everyone!
Hello Teachers!
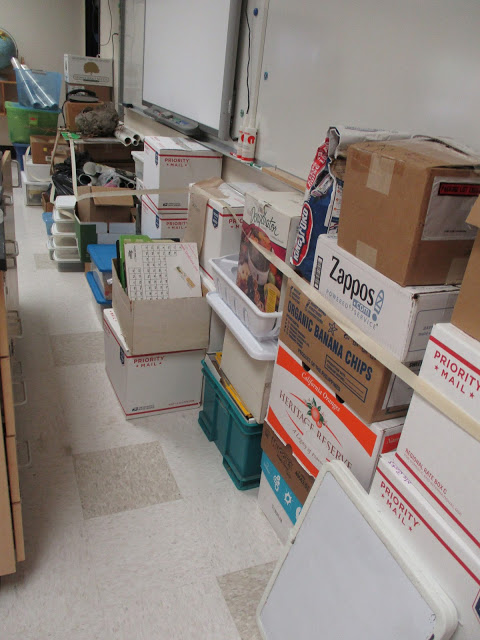
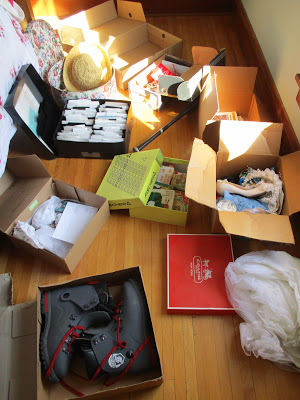
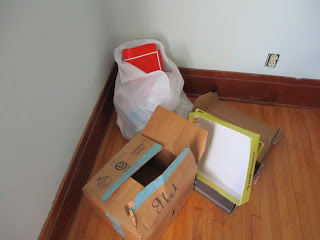
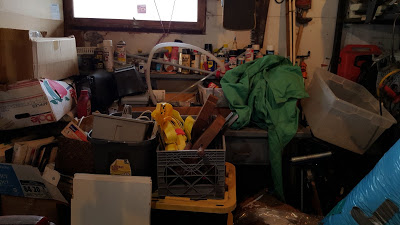
Can you relate to this? Boxes upon boxes waiting to be unpacked into a new classroom?
My brave teacher friend asked for help from her tribe of girlfriends and we were only too happy to oblige. Asking for help when faced with this much work is a good idea...Always.
I am so proud of my friend for asking...and receiving.
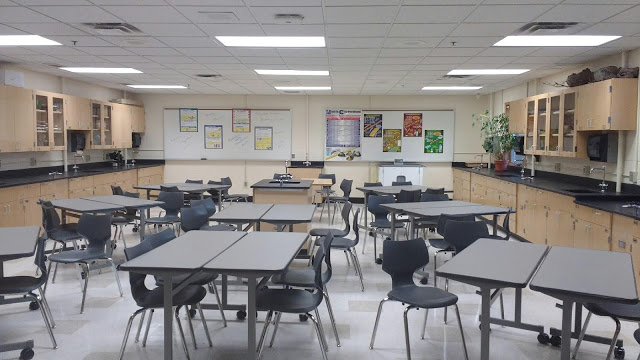
We got right to work. School is starting in a few days people!
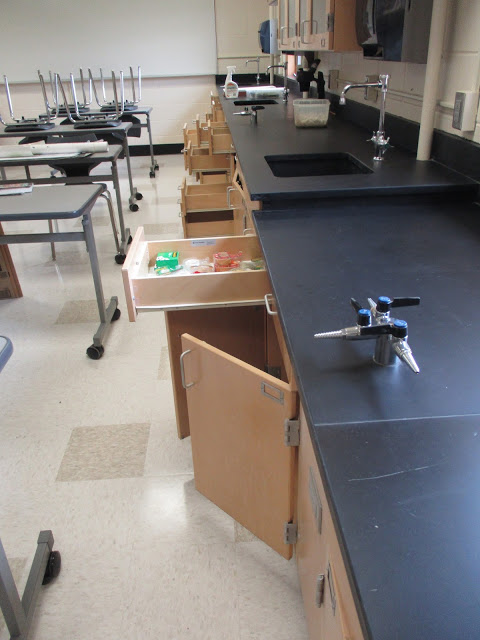
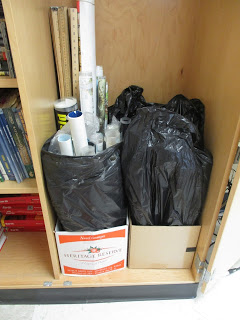
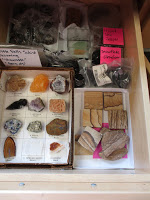
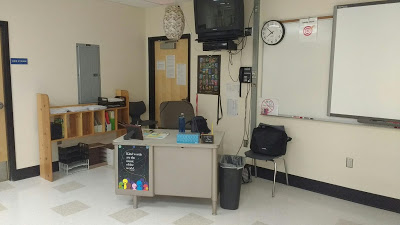
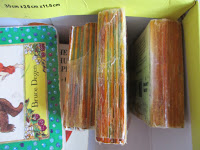
There were 2 rows of cabinets like these and unfortunately, partially filled with a lot of unorganized stuff that belonged to the school, including 6 cabinets filled with old textbooks.
Now, I found that ironic. Many schools today have students using chromebooks and smartboards. Who uses textbooks anymore? But I digress...we had to keep them.
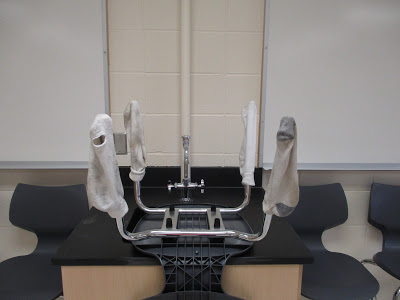
There was some cleaning to be done; wiping out drawers and shelves. We used old socks - BRILLIANT.
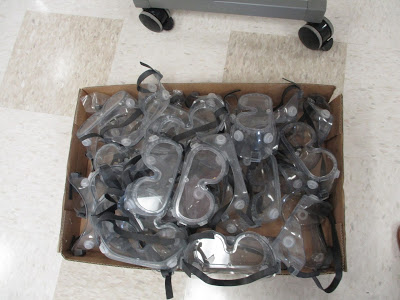
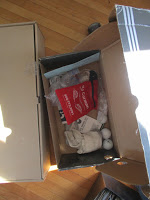
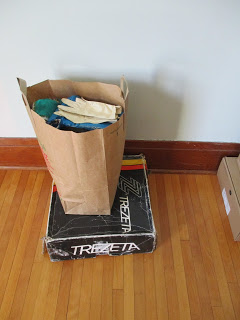
Discoveries were made, like this box full of goggles that aren't being used anymore.
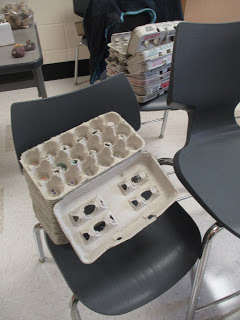
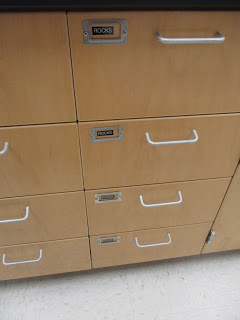
Sorting rocks. I.Kid.You.Not. There were egg cartons like these, FILLED with hundreds of assorted rocks.
We all had jobs to do.
And problem-solving.
There were posters. A lot of posters! They were in a very large laundry hamper, but that wasn't very attractive or appropriate for a classroom.
Since they were organized into plastic garbage bags by category, it made sense to keep them that way. There was one cabinet tall enough...and these 2 boxes just fit to hold most of them.
I have some nice clear bags I intend to gift her because...who wants their beautiful posters kept in trash bags?
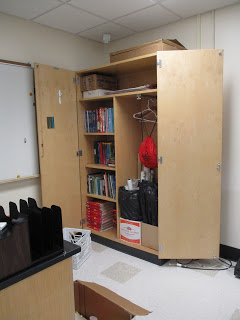
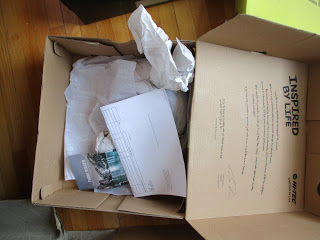
The coat closet! The rest fit on top in a large box. Phew!
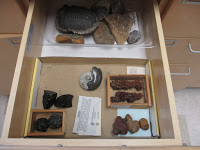
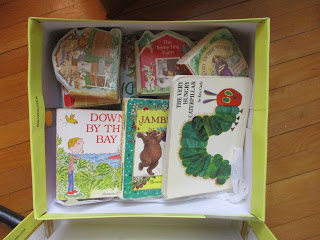
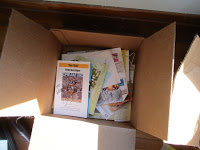
It was like a treasure trove unpacking the boxes.
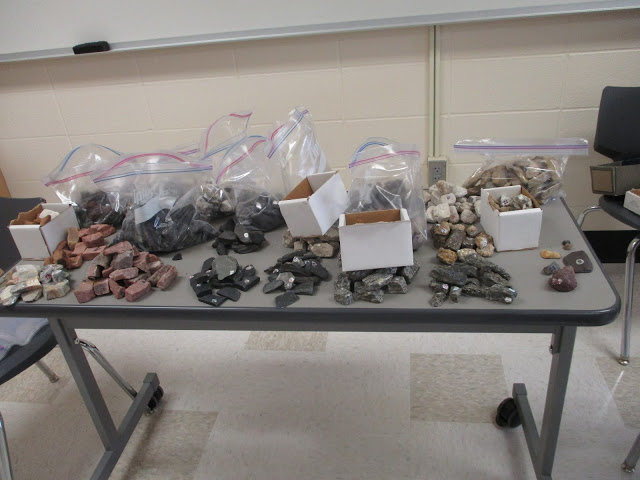
The samples this teacher friend has for the students are marvelous!
I just wanted to touch everything!
So I did!
And I got to label! Eeek, my favorite!
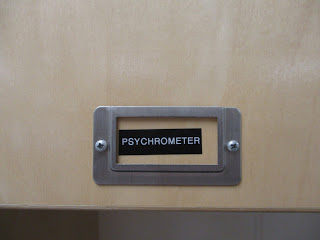
Hmmm...my labels aren't very straight.
And what the heck is a psychrometer?
Done is better than perfect in most organizing situations.
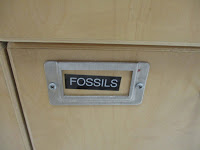
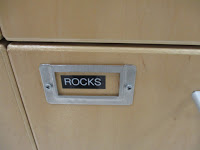
I love these metal label holders, they were on every cabinet door and drawer. Get your own
. I am imagining that these students will be able to put things away as well as my teacher friend being able to locate things easily and quickly.
We were done a few hours later, this is all that was left! A couple of boxes of binders to be placed on a shelf.
And at the end, we found homes for everything in the boxes and all the things that the school said she had to keep. AND there was empty storage leftover.
When does that ever happen in a classroom?
The only thing left to do is to put away the socks when they're dry.
There is a tendency when moving into a new classroom, to just shove everything in drawers and cabinets and call it done in the hopes of getting organized someday. Teachers will tell you from experience (there were 3 helping on this project), that someday never comes.
If you need help organizing your classroom,
to set up a consultation and get a plan. I promise I'll stick your labels on straight.
Leave a comment and guess what subject my teacher friend teaches.
The winner gets a drink gift card from Caribou Coffee!
Hello Friends,
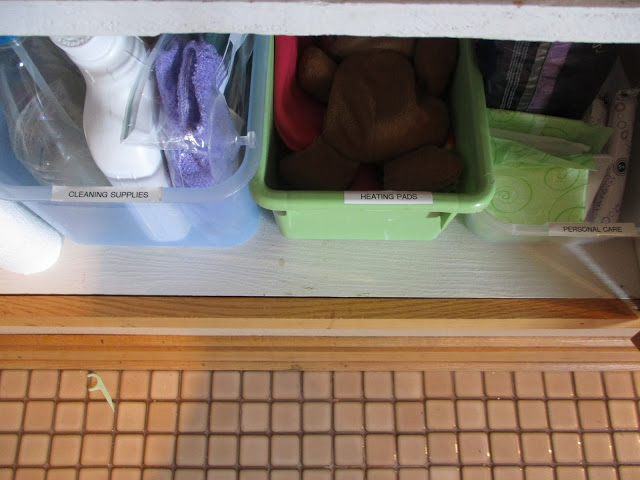
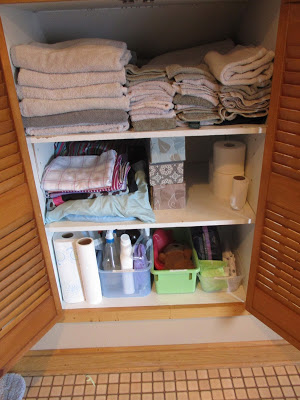
Today we are focusing on what is for most people, the smallest room in the house. Bathrooms can attract clutter like no other room because we humans love our personal care products. We love trying out what's new and different often before we've used up what's old and not working. This list includes: shampoo, conditioner, soap, skin care products, make up, nail polish, manicure items, bath items, first aid supplies, and cleaning supplies (for the bathroom). Add in a heap of bath towels, beach towels, hand towels and washcloths and times everything by the number of family members and there is a lot of storage happening here.
There are some rules to follow when organizing a bathroom.
Rule #1 Everything off the floor.
So much easier to clean!

A laundry hamper would be handy here as well as hooks for towels to be hung up. Follow your natural inclination. If you are continually dumping towels on the floor in a particular place, install a hook and see what happens!
This rule includes all the miscellaneous storage and items that are stored on the floor too!
The wastebasket can stay.
The challenge was to create space in the existing cabinet for these items previously stored in the plastic storage drawers.
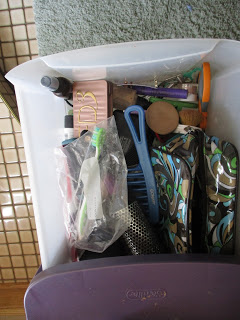
Drawer 1: Hair care items & make up
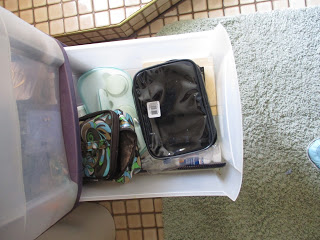
Drawer 2: Travel make up bags and assorted items
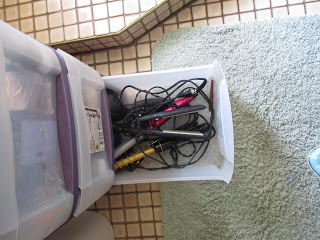
Drawer 3: Flat irons/curling irons
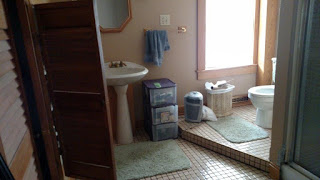
Here's what this bathroom had for existing storage.

A long cubby filled with items used everyday and these two cabinets that are stuffed full.

Rule #2 Decide what to keep.
This means discarding old, stained towels, holey washcloths, expired skin care products, old make-up, hair care products that didn't work as expected and on and on.
We all have this bathroom clutter. Get out a trash bag and get to work!
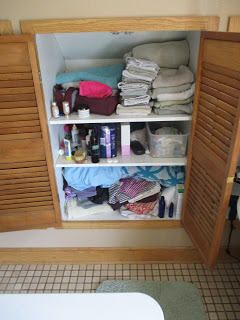
Rule #3 Storage. Everything kept has a home.
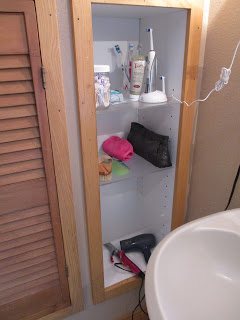
The long cubby was easy. Toothcare on the top shelf, make up in the middle shelf and hair styling aids on the bottom shelf. These are items that are used each day and need to be kept handy.
We used existing storage containers and decided to label the containers by category and also by name of the family member that the contents belong to.

Some containers still look cluttered...why you might ask? It's because...
Rule #4 Never organize someone else's stuff.
Unless permission is granted.
T
owels on one shelf, pillowcases/sheets along with tissue and toilet paper on another with cleaning supplies on the bottom. Simple and easy for everyone in the family to find.
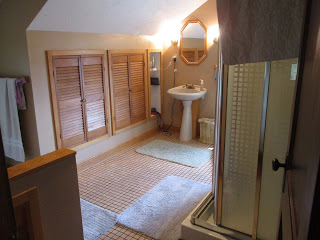
The after pictures look so clean and bright. It's amazing how decluttering can make a space feel more open.
We did throw out an entire black garbage bag and another box of items to donate too!

Everything off the floor and that's a plunger in that cute basket we found.

There is this full length mirror to contend with. It needs to be hung up properly on the wall.
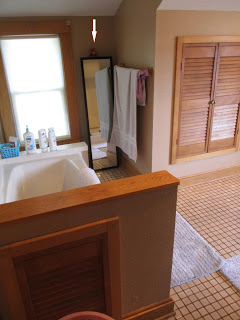
But when I went over to investigate, lo and behold there was a FIRE EXTINGUISHER hung up behind it!
So I wonder....do you think there are a lot of candles around that bathtub some nights? Ooh la la. You never know what you'll find when you organize!
What is the strangest item you keep in your bathroom?
Want to guess how long it took to declutter this room?
Hello Friends,
Recently we were looking for a powercord to a techy device in a client's home. After a cursory search of a kitchen drawer or two, she yelled, "Be right back!" and disappeared into the black hole most of us commonly refer to as...the basement.
In a few minutes, she reappeared with this armful.
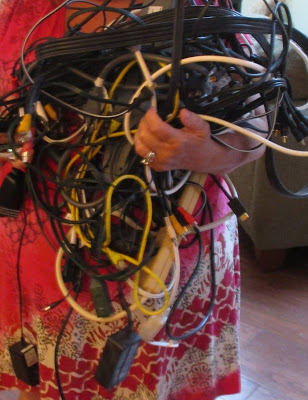
Luckily, the powercord we needed WAS IN THERE!
Ah-mazing. I love when things work out.
But, the real question is not "where is the powercord?" It is how to keep powercords organized.
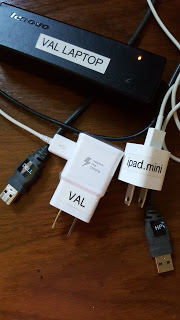
Get ready, it's really simple.
Whenever a new techy device comes into your home such as a phone, a laptop, a camera, an ipod, a TV etc., simply label the powercords with the name of the device before you use it. Make this a habit.
IT'S THAT EASY!
Now if you have a pile of cords and you're not sure what they go to, schedule a date night with your spouse and do your best to match them all up to the existing devices in your home. What if you can't identify them all, you ask? Then throw them all out and free up your brain and your space.
If you find in the future that you're missing a cord, it's
to the rescue!
Seriously everything you need can be found on the internet.
But back to labeling....
You can use masking tape or
, but my favorite way is by using a
such as this one.
Be sure to buy the extra tape cartridges too!

There are many label makers on the market today, and clients often ask me to recommend one. I say, simple is better, read the reviews, price out the tape cartridges and be sure to buy the label cartridges that have the split back.
It can be quite frustrating not to mention time consuming to peel off the label backing from the end of the tape.
Must have long fingernails!
With split back label tape, you simply fold the label horizontally and the tape peels off from the center. Easy peasy.
Labeling can become addictive, so buy a few cartridges.
Labeling ideas for you:
Labels come in different colored tape and print too!
Yes, I know I'm a geek, but I have to label my cords with my name or a family member may abscond with one.
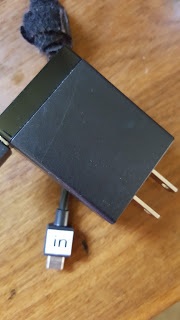
If you're frustrated by which side of your itty bitty metal phone charger goes into your phone, label it with
IN
so you'll easily always put it in right side up.
Because who can see the little symbol when it's black on black?
After you're done labeling the cord, then wrap it in a coil and use a
to secure it. These come in different colors and different sizes too! Use the extra large size for the largest cords in your home.


Next on my list is to label this mess of stereo cords. I want to be able to unhook my stereo and hook it back up without any help from my techy oldest.
I'm thinking of using the alphabet so I can match up the corresponding letters on the cord and the back of the stereo components. Hmmmm...

Where do you keep your powercords?
Have you ever thrown one out by mistake and regretted it?
I didn't think so.
Hello Friends,
Remember
from last year? Let's begin where we left off.
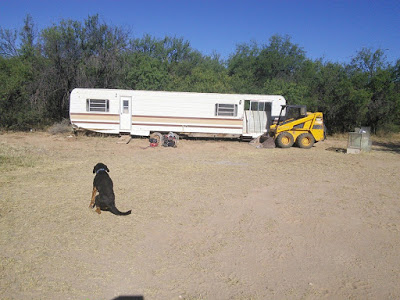
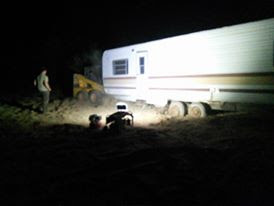
I went back to Arizona in February to help my mom get "unstuck" as she put it.
The huge storage trailer was still sitting on her land and while the contents had been sorted and stored in there, she was anxious to take the next steps to get rid of it all.
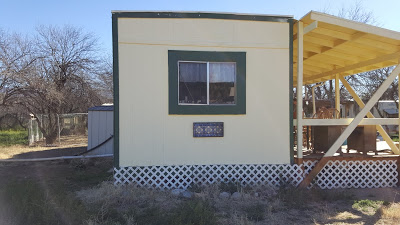
But first we worked on the inside of her house, by decluttering her living room. She lives in a tiny house - 467 square feet! To say space is at a premium is an understatement.
BEFORE
AFTER
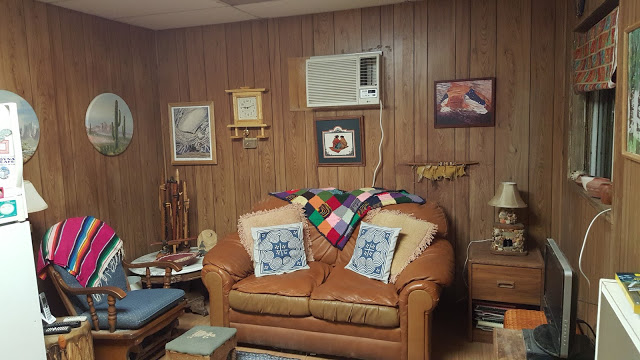
Little details made a BIG difference, like covering up the fuse box with a beloved print that we framed and using one of her drums for a table. Everything in this space brings her JOY!
We had a lot of fun shopping to finish off the details of the space. The shopping is always what clients want to do first, but it's actually the last step in the organizing process -
and the most fun!
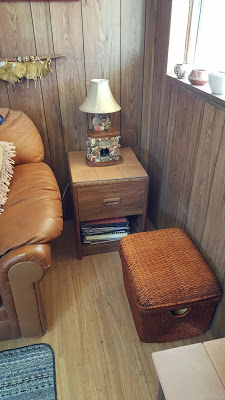
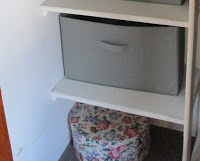
Inside the wicker basket is all sorts of musical instruments that are brought out to a campfire gathering from time to time. The instruments were stored in dusty grocery bags, shoved under furniture before. Not anymore! They are now in this cute and practical wicker basket with a lid.
We gathered a collection of small pottery bowls that were displayed in every room and put them on the windowsill. Collections are sometimes best displayed together.
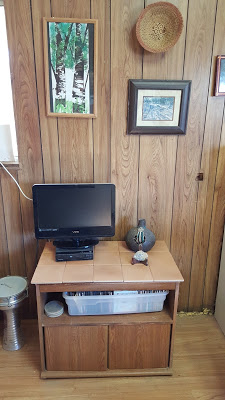
The tiles were found stored in a shed on her property, leftover from a project. They fit perfectly on the windowsill, end table and TV stand! Shopping from your own home is the BEST!
Don't you love how clean it all looks?
A lot of stuff went out to that storage trailer!
We also made some other little changes in how things were stored in other parts of the house. These were in a heap behind the door on the floor. So much easier to clean when the tools are easy to grab and go.

And we found this cute tiled tray to hang up on her house. It looks so welcoming.
While we worked together we had many conversations about the other trailer on the property...the one we sorted out the last time I visited.
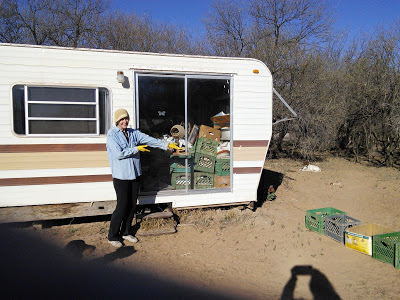
The conversations centered around having a yard sale/not having a yard sale, getting a dumpster/not getting a dumpster, giving everything away/selling everything, and having the trailer hauled away or dismantling it and hauling it to the dump. There were a lot of decisions to make!
So I left to go back home with nothing decided,
but her living room sure looked great!
Then this happened!
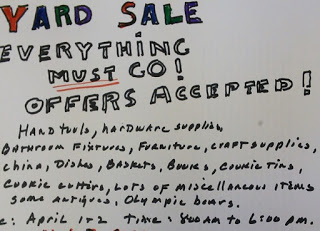
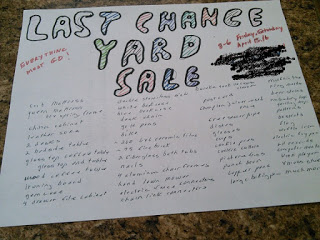
I simply LOVE when my clients make a BIG life-changing decision and take ACTION!

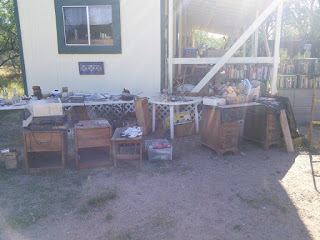

It was a 3 day yard sale and she got rid of it all.
Just.Like.That.
AND best of all, she had help! I LOVE when clients ask for HELP!
Her BFFs rallied with her and they had a really good time.
Then I held my breath...what about that trailer? I can hear you asking,
Yeah, what about it?
Next thing you know...
The tires had to be dug out of the desert.
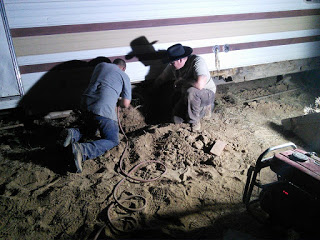
The pop-outs couldn't be popped in, so they had to be dismantled.
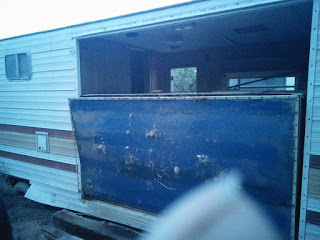
There were some late nights
and there may have been a broken axle involved.
Teddy Roosevelt once said,
“Nothing in the world is worth having or worth doing unless it means effort, pain, difficulty…"
But OH was this worthwhile! Look at all that clear space!

I'm proud of you Mom, well done getting yourself
and your trailer,
unstuck!
What's big decision surrounding organizing that you've been putting off?
What needs to happen for you to get "unstuck"?
*I may be able to help, contact me to set up a free phone consultation.*
Hello Friends,
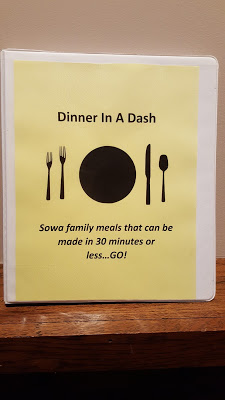
This post has to do with organizing recipes. I promise it won't make you hungry! My son's girlfriend put out a cry for help on Facebook.
"Looking for some yummy dinner suggestions that can be made within 30 minutes to an hour! Any help is appreciated."
She and he have summer internships and I imagine there are many "hangry" moments when they arrive home from work without a plan for dinner. This tens
e moment often leads to fast food or junk food rather than practicing good nutrition
as well as a relationship buzz kill.

Their friends responded by recommending a lot of Mexican food recipes that involved tacos, burritos etc. She posted that she already had those types of recipes in her repertoire.
So, I got to thinking...I had been wanting to put together recipe books for my kids that contained all of our family favorites from all through their growing up years. I cook so differently for myself now and in the midst of my
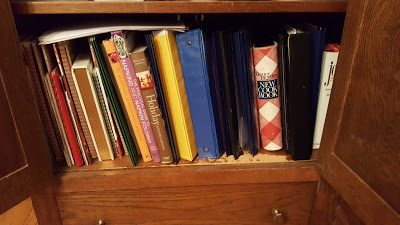
I had conveniently skipped over sorting out my cookbook shelf because...honestly it's kind of a mess.
That yellow binder has nothing in it and that pile of white papers are actually a large pile of recipes that never found a home.
I decided to carve out some time and create a recipe book for her and my sons. As with most fun projects I dream up, it took on a life of it's own.
I'll explain later.
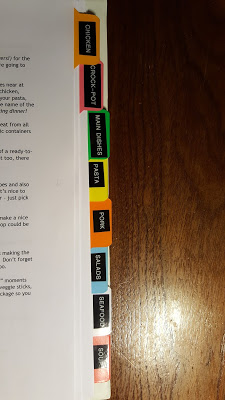
First I went through all my favorite recipes! Many of them are categorized in labeled binders such as Pork, Poultry, Desserts, Salads etc. I had made these years ago to save my sanity cooking for our family on a nightly basis.
I chose those that our family liked and only if they could be cooked in under 30 minutes.
I guess I'll have to make another book of recipes for Lasagna, Beef Bourgignon etc.
Then I typed up all the recipes.
I know, right?
It took some time. Turns out when I counted, there were over 50 recipes in 8 categories! I was excited!
Then I decided to raid my office supply cabinet and found binders, tabbed dividers and clear plastic sleeves. I love when I don't have to buy anything for a project. Don't you?
Finally I labled the tabs with my handy, dandy label maker. If you don't own one,
There is also this
available now. Who knew?
Be sure to label the tabs on the front and back. This makes the book more useable.
Then I typed up a Tricks & Tips sheet. These are things that I've learned the hard way that make dinner time a whole lot easier.
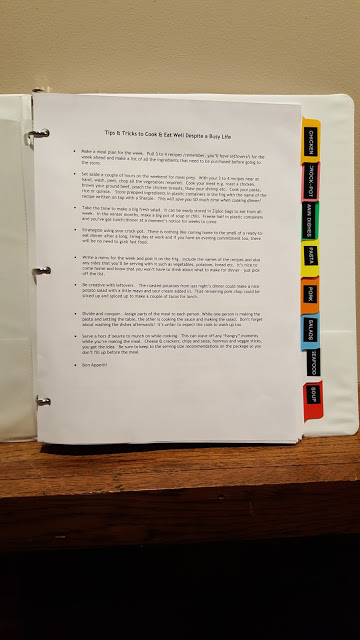
For example: On the weekend, pull out 3 dinner recipes.
Remember you'll have leftovers!
and shop for those ingredients. Then carve out a couple of hours and prep all the food; cook the chicken, rinse, chop all the vegetables, make the rice etc. Store it all in plastic/glass containers in the frig with labels for each recipe. Put a menu on the frig.
Then when you come home from work, pick which recipe, pull out the prepped ingredients and voila, you'll have it ready in 20 to 30 minutes. No thinking required.
I know many of you are brain-dead when you come home from work.
I also added a clear plastic sleeve with a note to cover the recipe at hand with it to keep it protected from drips and spills.
Messy cooks unite!
Finally, I created a clever cover page and inserted it in the clear sleeve on the front of the binder.
Then I was so proud of my work, I posted it on Facebook. Then things got a little crazy!
My peeps wanted to buy my book!

So, not wanting to disappoint, I made a few more. Who knew this idea would be so popular?
Evidently many people want to spend less time cooking and more time on other pursuits.
After thinking about this concept more, I'd like to offer this as a service. I take your family recipes, type them up, bind them or make a digital book with photos and you get your family history preserved to be used by the generations.
This gets them off the dusty shelf into the hands
and mouths
of your family!
Who's in?
What's your favorite family recipe?
How do you currently store them?
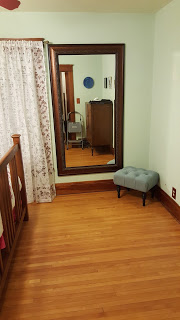
I thought, what is she talking about? I love my bedroom makeover! It's a little too "girly" for my husband, but when he's home from working in another state, I simply switch out the bedding to apease his tastes.
Pardon the
, but you get an idea of how dismal it looked before.

However, I like learning and I am interested in everything related to organizing, so I booked a 20 minute complimentary Feng Shui phone virtual coffee chat with her.
Here's the
if you want to book one for yourself!
For those of you who don't know much about Feng Shui, Kim says, "Feng Shui is based on the principle that your environment reflects and affects your life. It is an ancient Chinese art and science which works to arrange your home in a way that is harmonious and reflects what you intend to manifest. The placement of items within your space affects the energy or how the space feels."
These were my takeaways from my chat with her:
1. Bedrooms = relationships/partnerships AND bedrooms also affect health, mood and obviously sleep.
2. Have to have 2 nightstands, same size and weight. 2 nightstands bring relationships into balance.
I only had one nightstand!
3. Solid headboards and footboards provide support in your life and relationships.
My bed has an open headboard & footboard which "cuts" my energy according to Kim and could cause health issues (mental, physical, emotional).
4. Avoid having large mirrors. They give off a lot of energy.
Check out this king of all mirrors that I have in my bedroom! It used to be at the foot of my bed, that was terrible as I'd wake up and immediately see myself. I hated that, so I moved it. At least when I walk in the room, I'm not in its view so while it's not optimal, Kim said it could work.
This mirror brings me joy, so it's staying.
The other points I decided to work on. After all, who couldn't use a little more support and balance in their primary relationships? I can!
First was the nightstands. For years, we'd used the end tables from the living room. They were heavy and bulky and the wrong size.

Then I purchased a vintage phone table from the antique store and I loved it since I could sit on it and put on my shoes on in the morning, but I had to put it on the other side of the bed as it the bulkier end table wouldn't fit in this narrow space.
Sigh...

So I started thinking about new nightstands; a matching pair.
I started looking on
sites that my town uses to sell things, I roamed the used furniture aisles at the thrift stores. And then these beauties magically came into my life for FREE!

A local hotel was remodeling some rooms and put a large quantity of furniture out for the trash pick up. It was my lucky day! The universe delivered, God is good.
Kim says to clear used furniture with sage to "eliminate any negative energy they may have absorbed from their prior owners". I didn't have sage, so I painted them and replaced the hardware. This she states, "gives them fresh energy!"
I picked up some paint with the appropriate color named "Zen",
how perfect!
to match the leaves and stems of the peonies on my duvet cover.

And I purchased some new hardware for the handles. B
e sure to measure first!
They were transformed!

Next was the headboard. Kim said I could wrap fabric around the spindles or paint the wall behind it, or tack something up on the back of it. Weren't all those pillows enough?
"No", she said, it had to be solid.

I thought about this for a long time....like weeks. Then it came to me. I have a quilt that my great-grandmother made that I simply adore. I have it on the bed sometimes, but because it's from the 1930s, I am really protective of it. It was the perfect solution.

I swear I could feel the energy in the room shift, the moment I hung it and smoothed it on the rail. Wow! Perhaps my great-grandmother is lending me some support? I love this idea.
But there was still the footboard to cover.... I am currently crushing on
this beautiful hand-stitched, hand-appliqued coverlet
, but finances being what they are, I settled for a plain white sheet, doubled over,
for now.
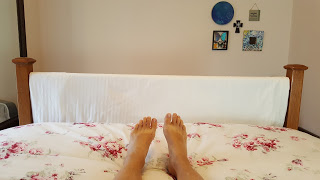
The difference is amazing! Since adding these minor changes to my bed, I am sleeping very well and enjoying the best frame of mind. JOY
When speaking about Feng Shui, Kim says, "I've seen more people embracing it recently. They can feel the energy in a space. You go into a space, and you know it doesn't feel good, but you don't necessarily know why. This [Feng Shui] explains why it feels good, or why it doesn't. People are a lot more open to finding things that will help them feel better in their homes and offices."
I agree. Those mismatched end tables & phone table always bugged me and it's weird, but I really do feel much safer and secure with my headboard and footboard covered and who knows? Maybe I'll see a shift in my relationship too?
Have you applied any Feng Shui principles in your home?
And, did you experience a shift afterwards? I'd love to hear about it.
Kim can be reached at Kim@FindingYour Fiji.com and be sure to check out her awesome website www.findingyourfiji.com
Hello Friends,
Recently I had the pleasure of a client gifting her remaining organizing hours to a friend to use. I have a policy on my packages that the hours paid for in advance have to be used within 6 months. Use them or lose them. So this client decided to pay it forward.
So sweet!
After looking at various spaces in the home and me sharing ideas. We had one hour left to work and so we decided to tackle this closet in the front of the house.
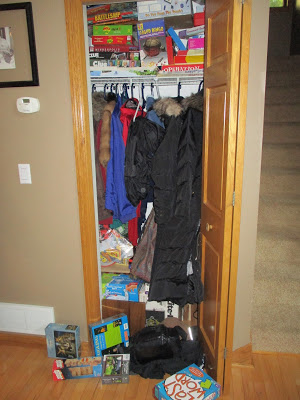
There was a lot of stuff in this closet, as you can see! We only had an hour so we quickly sorted everything by category. First outerwear, then games, then miscellaneous. It was amazing how quick it went!
We kept the video camera on the top rack. Whittled down the coats/snowpants to what the client actually loved wearing. Stacked the wooden shelves rather than having them side by side, and stuck all the off-season shoes in them. Since the off-seasons coats are in this closet, it only made sense.
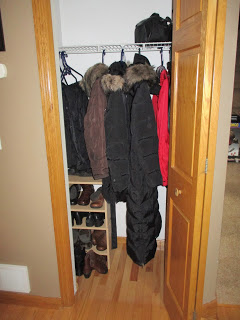
Then we added in plastic bins that the client already owned and put hats, gloves and scarves in them - after sorting out what would be kept. Again, it's summer, so most everything in this closet is off-season.
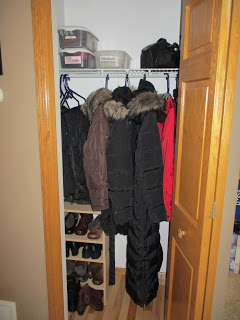
There was still a little room on the floor so we were able to place the vacuum cleaner here. This was exciting as it didn't have a home. It was kept previously on the landing to the basement stairs!
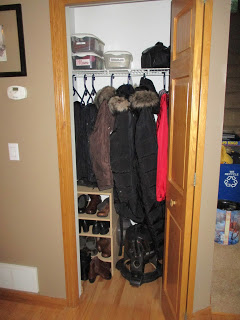
Now it's a closet that makes good sense. Everything for fall and winter is kept here, neat and tidy. Summer shoes and jackets are kept in a different closet near the door to the garage - the door they use the most. In the fall, the client could easily switch out the closet contents. This can be a good way to check for anything in need of repair or replacing.
What happened to all those games, you ask? They were quickly sorted into donation piles and a pile for the kids to sort through downstairs. Then they will be stored in a box to be kept with Thanksgiving and Christmas decorations. With older grown children visiting, this is when they are most played, so it makes good sense to store them together, rather than taking up valuable space in the much used closet.
See what can be done in just an hour? Ah-mazing.
What area of your home will you tackle with a free hour this week?
Hello Friends,
Today I share one idea for tackling the dearth of paperwork present in each and every one of our homes.
This is my "long term" storage. I organize my tax records and relevant paperwork for the year in labeled file boxes.
are my favorite file boxes and hold up the best. I label by year, last name or company name
(as we are an entreprenurial family).
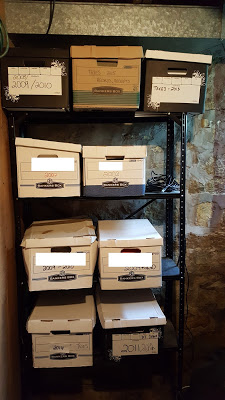
In one box, the years are combined in one box to save on space. The IRS recommends that we keep personal tax records for 7 years and business records for 10 - just in case of the dreaded audit. Hence the 9 boxes with 1 combined = 10 and notice they fit nicely on this shelf unit...
well except for the one on top that is teetering a little.
A friend recently shared that they keep their tax records in folded-over, stapled paperbags. This could be a clever storage idea - except they have 38 bags going back to 1978!
When working with clients, I stress that we must create a system for them to be able to manage their paperwork. The system has just a few rules to remember and as long as one works the system, all will be well.
My system is to take one box a year
(the box that is 11 years old)
to the annual free "shred day" at a local bank and hand it over to be shredded immediately and confidentially.
True confession: I used to try and shred all the paper in the box myself and instead, I had a broken shredder each year. Don't do this.
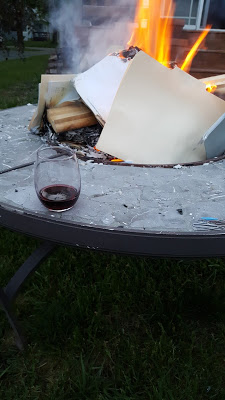
This year I was on vacation during free "shred day" so it was time to get creative.

It is rather fun to build a big fire and burn it all! I had to resist the urge to look through all the files though, and despite my best intentions, I did find a couple items to save...
My dog's pedigree.
Never mind that he's 11 years old.
When he passes away, I'll pitch it.
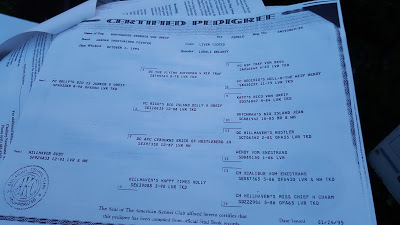
A spine scan for a family member. I like keeping health records in a folder labeled by person.
I also found our home appraisal from 2007, before the bubble burst...
big sigh.
It took a few hours
and a large stirring stick,
I'm not going to lie. But it was a pleasant evening and a glass of wine made the experience even more enjoyable.
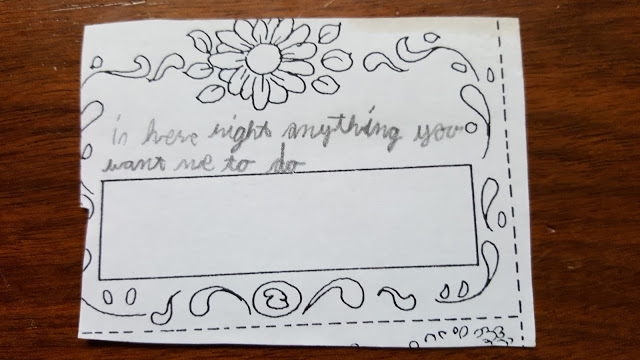
My favorite thing I found?
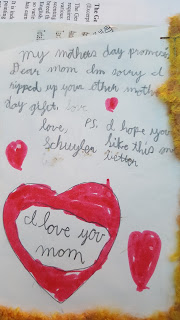
There's even a few "coupons" in there that I haven't redeemed! He's 21 now and one of the coupons says "get up in the morning". I can't wait to use that one when he's home sleeping in!
But this one is priceless. Hmmmm...maybe I'll use it to have him burn next year's box!
When's the last time you accessed your tax records?
What's your system to keep them manageable.
Hello Friends,
It's spring and many of us are outside gardening in the sun. Some of us have to organize our backyards a bit before the gardening can commence.
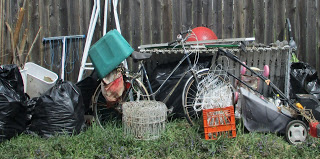
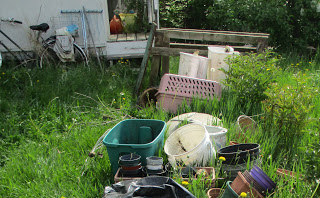
The first task was to pull all the junk out of a homeowner's backyard and get it ready for a ride to the dump. There was a lot of junk hiding in the overgrown landscaping.
Some neighbors may have thought this was a free pile and taken some things, which was more than fine.
One man's junk, another man's treasure.
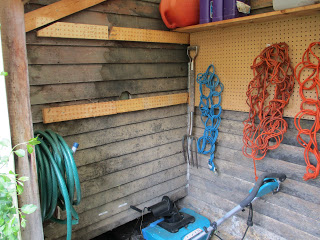
Next up was to sort out this cluttered tool shed. Notice a lot of blank vertical space that could be utilized.
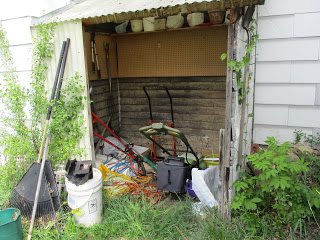
It's amazing how much unorganized stuff can fit into a small space!
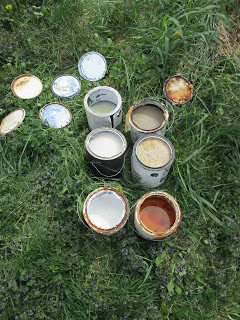
Labeling the tops of buckets makes it easy to determine the contents.

Old paint, as long as it's latex, can be left open to dry out and then tossed in the garbage.
Although it may take awhile to dry out...
This is a clever solution to storing snow shovels. They are plastic so no need to worry about rusting.
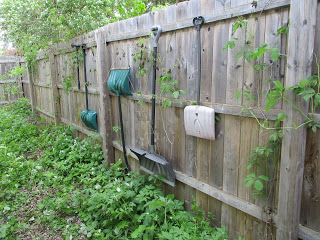
On the other hand, this storage solution doesn't work very well.
There was a pegboard on this wall, but it was easily moved to the opposite, more easily accessed wall. Bring out the powertools!
Crocheting the powercords is the simplest way to store them. Simply find the middle, double it up and make a loop and then pull a loop through that loop until it's all neatly crocheted into a chain to hang up. When one goes to use it, simply pull the last loop out and it will all come undone without any tangles.
Try it!
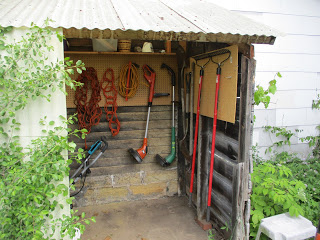
Here's the view with the reinstalled pegboard. Hooks for pegboards can be obtained at any hardware store and there are a variety to choose from for every type of tool imaginable. It felt good to get all the shovels and rakes out of the weather.
With the organizing done, the weeds were next.

There was a sweet surprise awaiting! Strawberry plants!

What might you uncover in your yard this Spring?
Hello Friends,
This is a short but sweet post because it has to do with the "Spruce" aspect of my
. As you may remember, I am sprucing up my home, just in time for Spring.
Because I've had nearly every room in the house repainted, I've taken down all of the pictures. There is nothing quite like the feeling of fresh clean paint on the walls and I'm reluctant to fill the refreshed walls back up again with nail holes and the same old line up of tired photographs and boring prints.
And while I am creative, I also have next-to-zero decorating style as my best ideas come from other bloggers. In this case, I stole this idea of how to create an art gallery wall from a blog called,
.
An art gallery wall is a personal collection of items that speak JOY to the owner. They can be of any size and shape and can include, canvas prints, framed photos, baskets, decorative plates, objects d'art etc. Anything that can be hung on a wall.
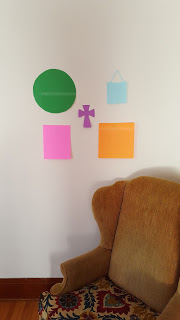
First I gathered all the items that I want to include on the wall, which will be in my bedroom.
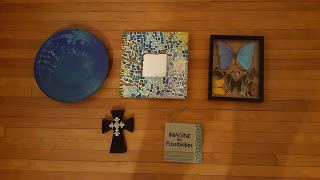
These include: a decorative art plate that we collected on our honeymoon, a mosaic mirror that my youngest made with the neighbor when he was 9, butterflies from Puerto Rico, a cross with bling gifted from a sweet friend and a plaque that says "Imagine the Possibilities".
I imagine I'll love waking up and reminding myself of that everyday!
Then I made templates.
This my friend is absolute genius!
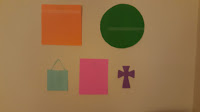
I laid each piece on colored paper and traced then cut around it.
Then I taped them up on the wall in various configurations. This helps get the spacing just right, plus it was fun to play around with it for about week. Each morning I'd move things around.
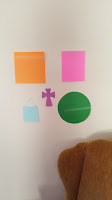
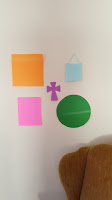
Once I settled on which configuration I liked best, then it was time to measure. It was easy to hang up an art piece that had the hook or hanger at the top of the frame, but most had a hook part way down which would mess up the spacing. So measuring next.
Measure the top of the plate to the tip top of the hanger....
Then mark the template with the same measurement.
Hammer the nail in and then tear off the template and it's sure to be in the exact right place when it's hung up.
Genius!

So which template grouping did I choose?

I love how it turned out!
This little organizing project was so easy and fun, I almost wish I had more to hang up! For more inspiration, Google
What are some of the items you'd include on your own Art Gallery Wall?
Who's going to give this project a try?
I'd love to see your finish on Instagram #valeriesowa
Hello Friends,
Confession time. I've
never
been able to adequately vacuum underneath my bed. I say adequately, because I've always had to vacuum around the
storage space
dumping ground for boxes of stuff. I say "stuff" because I couldn't tell you exactly what was
stored
dumped there.
That is until today! I was a bit scared to start, but I remembered that I am brave.
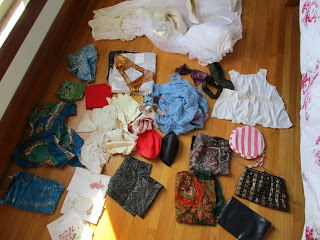
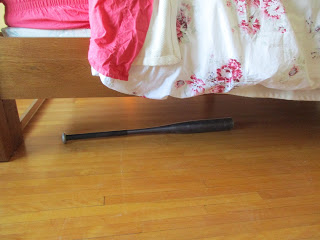
I pulled everything out and here's what I discovered hiding under there.
Only 10 boxes.
Not as bad as I thought.
Pulling everything out of a dark place into the light takes a lot of the fear away.
But then...
Dried cat barf...oh no!

And a few dust bunnies.

But then things got ugly.
To think I've been breathing this. YUCK.
And this! Oh the spiders that have enjoyed this space. I nearly quit right here.
Instead I took a break and got a cold drink.
Have you tried this?
Seriously delicious.
Then a lot of vacuuming and washing the floor. Then I was able to go on.
Opening all the boxes was a bit of a treasure hunt...except no treasure *sigh*.
I spy with my little eye, a baseball bat.
Can you?
Mountaineering boots! In Wisconsin?

Empty boxes...or nearly empty.
A box lid...seriously folks you can't make this stuff up.
And then a real surprise! Board books from when my boys were babies. All their favorites. Should I keep or should they go?
What would you do?
Upon closer inspection, most were all taped together...in multiple layers. And if they weren't taped, they should have been.
I asked myself if there would be any joy in reading these frayed, worn out books to potential grandchildren?
The fact is that I was reluctant to even
touch
these stained, gross books.
So that was my answer.
After thinking about them and feeling what they meant to me, I laid them all out, took a photo and tossed them. This way I have all the titles handy for potential grandchildren, taking up a fraction of the space on a flashdrive not in a lost box collecting dust and mouldering under the bed.
Next box. Oh my! Items from my wedding day.

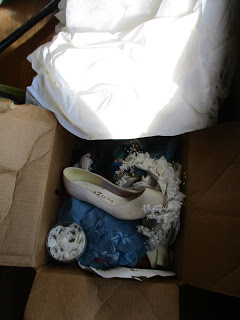
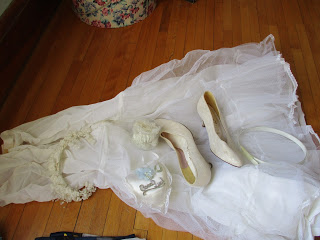
So many fond memories of that special day. The headpiece, the shoes, the garter and even the hoopskirt. Really....a hoopskirt?
It all went.
The wedding dress itself is boxed up elsewhere. I envision a future DIL trying it on and saying it's not her style and then I'll get on some reality wedding show where they make over my dress and she loves it.
A girl can dream right?
Memorabilia of my husband's. These I combined and taped shut and placed with other boxes of his for him to sort out.
Rule: Never organize someone else's stuff without prior permission.
Photos! Hundreds of photos. At least they are sorted by event. These were moved to the photo storage facility in our home AKA the attic.

Hmmm...another empty box. I see a trend here.
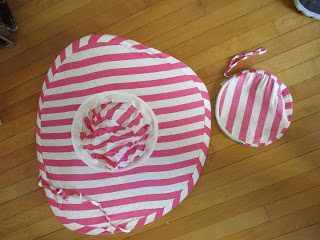
Hats inside the hatbox! I change these out seasonally, so good timing to get out all my straw hats for summer weather and store the winter hats.
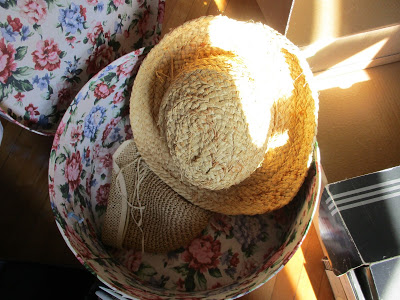
The hat box I placed in my closet, although I would like to get it off the floor in the future, because you know...vacuuming.
More treasures from the "Memories" box.
S
ome of these items held a special memory.
This tie-scarf-thingy I wore to the interview for my first job. It went perfectly with my blue suit. The interviewer (my boss) told me later that I looked like a flight attendant! Somehow she hired me anyway.

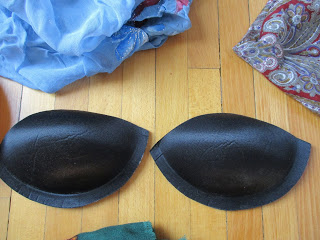
And these! I used to glue these to my boobies so I could wear glamorous strapless dresses. Oh those were the days!
And who remembers these pop-up hats?
After sorting it all out. This is what I kept from those 10 boxes: A collection of handkerchiefs, 1 bandanna for hiking and a vintage purse. All neatly put away in my closet.

The trash pile.
The donate pile. I imagine someone will LOVE those white kid gloves.
Empty boxes come in handy for storage elsewhere in my home.
Now look under my bed! Clean, clear space. Ahhhhhh.
The only thing that remains is that baseball bat....just in case.
When's the last time you really cleaned under your bed?
What was the most interesting item you found?
I carved out some time and asked for help.
I get by with a little help from my friends
...as the song goes. No shame in admitting there are some things that are not in my wheelhouse and furniture construction is one of them...
or so I believed.
My friend, Suzette, to the rescue!
I made tea, she brought her cheaters and we got to work.
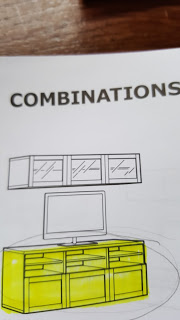
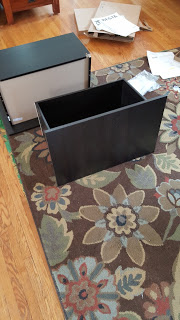
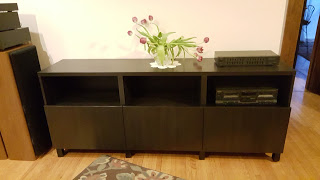
This Besta media storage unit is from
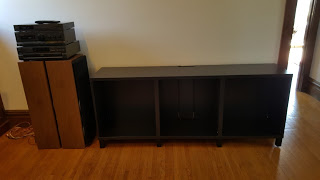
. I knew it was perfect for this and future houses because there are so many different configurations that can be added on to it. I liked how narrow and sleek it looked in the store and since there are up to 6 shelves, I was assured that there would be space for our old school 1992 Technics stereo and all of it's components. I chose the 3 drawer model to hold all of the CDs, DVDs and various cords to the TV as well.
The first step was to unpack all the boxes.

We marveled at how amazingly organized the contents were. Then to lay everything out. There were a lot of instructions! It was a little intimidating.
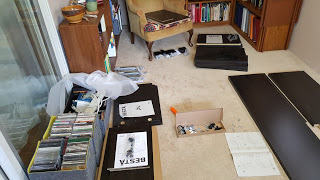
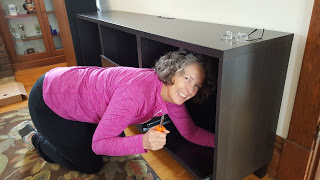
But then we got going and it was surprisingly easy! It only took us an hour to build the frame!

It's important to spend time looking very carefully at each picture. All the hints are there. And it's a very good idea to separate out all the little screws, plates, etc. before starting - it's easy to lose these little things in the carpet. We ended up using plastic containers to sort everything
but didn't get a picture.

We moved the frame into position before adding the drawers and shelves.
Building the drawers was easy.
I thought installing the sliding hardware for the drawers was going to be the most difficult, but as you can tell, it was a cinch!
Except when I installed the drawers into the frame, this happened.
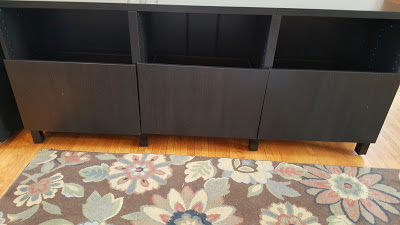
The left drawer is 1 inch lower than the other 2 drawers!
We took a break for lunch (
thanks to
for quick delivery!
) and pondered what to do. While we were thinking, I placed a vase of tulips on top. Flowers just make things better.
Just at this moment, one of my engineering sons came in the door and suggested I swap out the left drawer with the center drawer.
Who knows why but EUREKA, it worked!
Maybe it was the tulips?
When installing the shelves, it was important to measure and place the components as I went along. I had to keep adjusting the shelf brackets to get them all to fit correctly. This took the most time.
Then it was time to install these totes into their respective drawers. They fit perfectly!

BEFORE


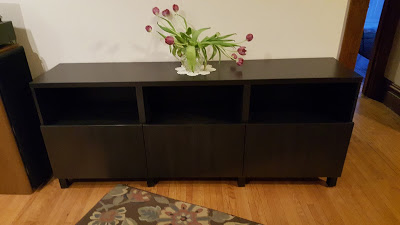
AFTER
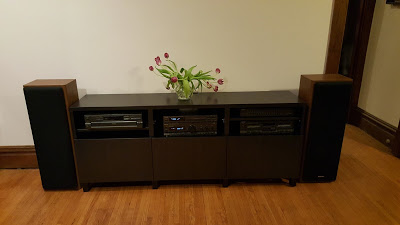
I'm not a fan of having a TV in the living room, but won't it look wonderful up on there?!
Truth be told, I have to purchase longer power and connection cords to hook up all the stereo components, but for now the radio works!
I have to say, Ikea ROCKS! I'm inspired to recommend their furniture to my clients and who knows? Maybe I'll even build it for them!
A big shout out to my intrepid friend, Suzette. Thank you!
What's on your Ikea shopping list?
Have you ever put together a piece of furniture? How did it go?
Hello Friends,
It all started with this laundry basket at the foot of the stairs. For years, we have been "
making
missing baskets" with balled up towels, cloth napkins, dish towels etc. A resulting pile of laundry inevitably followed that one either picked up or walked on/over.
You can guess which.

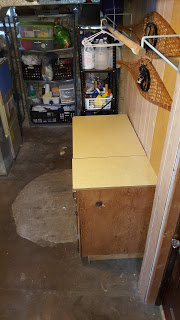
There were other issues in this basement of ours. Namely a weird floor plan and a lot of clutter. Notice the internal vacuum hose hanging up? The broom and mop are hidden just around that corner. None of this cleaning equipment is easy to access.
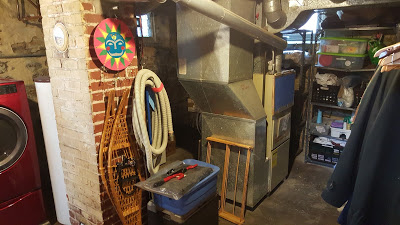
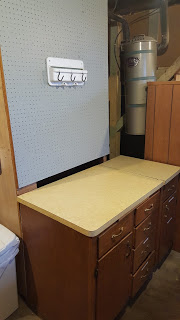
This old kitchen cabinet is perfect for folding laundry and doing small projects, but the grey pegboard hanging above has been unusable space.
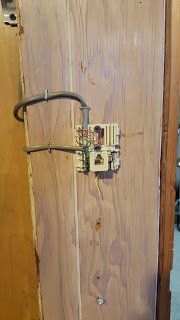
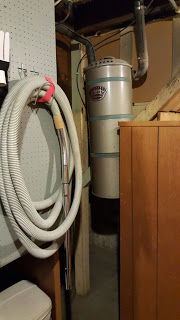
Add to this issue is the challenge of reaching the outlet for the internal vacuum! You can guess how often I climbed on the cabinet to plug in the hose...
like never.
This view from where the counter sits, shows a hanging coat rack.
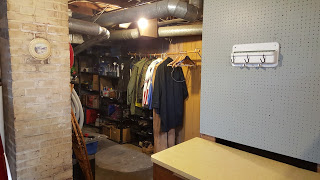
Notice all the empty hangers? I was able to fit ALL of my coats in my revamped walk-in closet in the bedroom! I kept the ones that brought me JOY and donated the rest. These left are my husband's and I can't recall the last time he wore a coat, so they went in a box to be sorted.
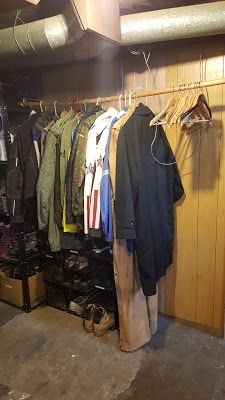
And what is that lurking under the coats?
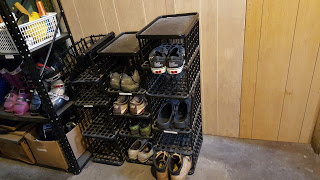
A lot of dusty old shoes that were also inaccessible. Who knew we had so many old shoes?
I wanted to create more space in the basement as well as put all the cleaning supplies in one area utilizing the pegboard. I also wanted to better use this cubby in the stairwell.
First I removed all those ugly plastic shoe racks and sorted out the shoes. I tried this first, but the shoe cubby didn't quite fit in the space.
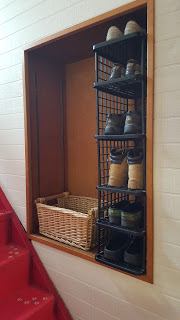
Looking around the basement some more, I located the original shelves and luckily the shelf brackets were still in place (13 years later).
Some would call this a miracle!
I was able to make a quick trip to the hardware store to get a small package of shelf holders
and pegboard hooks
and voila!
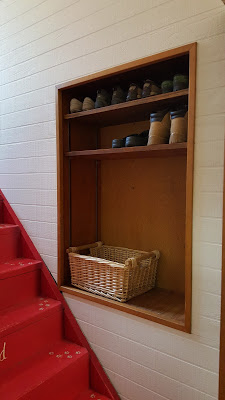
So much better.
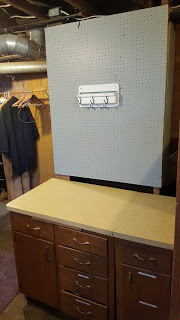
Then I tackled moving the old kitchen cabinet to it's new location, underneath the coat rack bar.
The end of that cabinet needs some painting

The snowshoes could be hung a bit lower
These little details can make a big difference in the JOY factor. I'm looking forward to finishing up these small touches.
I did remove this equipment from another era.
Did we really have phones that hung on the wall?
Next up, tackling the pegboard wall. First I removed this little white rack and donated it. It came with the house and never worked very well.
But evidently the last time I painted, I'd painted AROUND it...lazy, I guess?

Then it was trial and error until I found the right paint color.
Geez, you'd think I'd have my paint colors a little more organized!
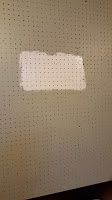
3 times the charm!
It was so satisfying to hang up all the cleaning equipment on this pegboard! I moved the bucket and wastebasket here too. Now everything is handily in one place.
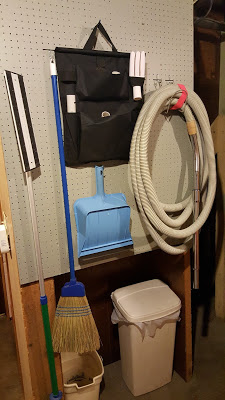
And now with the little help from a step ladder, I can now easily reach the vacuum attachment.
Dustbunnies beware!
The best part of this shuffle is that it only took a few hours, including the run to the hardware store and painting the pegboard error.
When the keeping and sorting is figured out first, the organization goes smoothly and the real fun begins. Now to enjoy this new space.
Is there anything you'd love to change in your basement?
What's holding you back?

Hello Friends,
What with all the spring cleaning going on, there are probably a few areas of your home that need fixing. This is where a personal tool box can really come in handy.
I labeled mine because when my boys were growing up they were likely to use and lose tools, so having my own toolbox saved my sanity. There is nothing quite like the feeling of starting a project and having all the tools you need in one place.
For the box itself, there are many options. I used a child size toolbox, leftover from when my boys were young. I took out the removable tray as it took up a lot of room.
One of my clients uses
. It's like a big purse for tools! Lots of pockets to organize small items too and in the largest pocket, you can fit an electric drill and charger too!

Some tools you might like to include in your toolbox are:

Level - comes in handy for hanging pictures
Pencils - for marking
Sharpie - for labeling
Finish hammer - perfect for pounding in a nail
Wrench
Allen wrenches
Pliers
Needlenose pliers
Small pliers
Assorted nails & screws of all sizes
Wire
Stud sensor
Screwdriver -
is on my wish list to replace the 7 that are pictured here
X-acto knife
- gets all your sticky drawers to slide smoothly, among many other uses
*
- removes stickers and other adhesives off in a jiffy
Tape measure
All these tools fit perfectly inside.

You'll want to keep your toolbox handy. My sole purpose in creating a toolbox for myself was to avoid going into our garage. My organizing jurisdiction stops with the house. The garage is my husband's territory.
YIKES!
Don't judge.
Keep your toolbox preferably somewhere on the main floor of your house. My client with the nifty toolbox keeps it in the closet of her office.

I keep mine in the basement, inside the drawer of old kitchen cabinets in my laundry room area. Wherever you keep it, be sure it is easily accessed so you can grab and go!

If you have many in your household that like to borrow tools, you may want to hide it!
*If you want to make your own natural Goo Gone, you can!
Mix equal parts baking soda and coconut oil.
Make a paste.
Add 3 drops, more or less, of orange essential oil, if desired.
Thanks to my DIY friend, Brenda for sharing this recipe!
Where do you keep your toolbox?
What tools do you have that you couldn't live without?
Hello Friends,
During the "spruce" step when organizing a home, it often becomes glaringly apparent that not only do rooms need a thorough cleaning, but paint is badly needed. This is a very important step and one that my clients are eager to complete. There is nothing quite like being in a freshly painted room,
except maybe stepping into a brand new car!
This has been my "uniform" this past week as I was busy prepping my home for painting,

I've seen clients do it themselves or ask willing family members to paint rooms for them but in my case, I hired it out, but did all the prep.
I tried to trade for organizing services, but my painter friend would have none of it. In fact, he got a little nervous when I suggested it.
Hmmmm...I wonder what his attic looks like?
If you're considering painting a space in your home, here are some
tips.
Take before pictures.
Looking at them may help you decide what to move back in after your done. Plus it's fun to show friends, family and Facebook after painting is complete.

Hoping for a treat!
These cranberry walls are pretty, but dated. There were gold brocade drapes too - yikes. Time for a change!
This kitchen had yellowish walls that over time became more yellowish.


This side entry was dark and tunnel like, leading to a basement. The wood on the walls was scarred and poorly patched in many places.
The office had very dirty walls and very large holes from a cable project gone awry.


There was so much clutter on the walls and many, many nail holes underneath it all, which is why it stayed up there. I'd rather look at clutter than a lot of nail holes.
How about you?
Move everything out, including what's on the walls.
Luckily there was one room in the house that was recently painted, so everything went in there. Using
will make it easy for one person and quick work with two.

Likely you'll find many treasures,
like the knob to our air conditioning unit
and a lot more cleaning. I ended up calling carpet cleaners as there were many pet stains that were uncovered. Gross.
Dust the walls
, or in my case,
wash
scrub the walls. Use a mild detergent and a large industrial sponge.
I admit, I got a little misty when I washed this wall...but reminded myself I have a picture...and everything has an expiration date.

Our family growth chart
In the kitchen, a ladder came in handy to wash the wall at the tops of the cabinets and I discovered this! YUCK.

Seriously friends, don't judge. When's the last time you cleaned the top of your kitchen cabinets?
Spackling.
Buy a good quality spackling compound. Vinyl spackle is nearly impossible to sand off once it dries.
Who knew?
The painter happily redid much of my hack job,
he gets paid by the hour.
Don't use the paste kind, it balls up and flakes and is very messy. Find the kind that is like ice-cream. It goes on easily, dries fast, and a light sanding will remove all but what's in the hole.
Taping.
It's worth going to a paint store and buying the best quality masking tape you can afford. I like the 1.5" size. Then as you lay the tape on your moulding, use a small scraper and press the tape down on to the flat surface that the paint could spread to. Paint likes to seep, and pressing the tape will eliminate all the little air pockets and make for a perfect seal.
Here's the finish!
BEFORES AFTERS


The new paint color really makes the woodwork POP!


Those trash/recycling bins need to move.


That laundry basket needs a new home.

This side entry finish is my favorite. It looks so much cleaner, brighter and more welcoming. Just what I was aiming for. My entire downstairs feels lighter and happier. JOY
Want to guess how long it took to move everything back?
If you could paint any room in your home, which would it be?
Hello Friends,
This week's organization project started with this DIY hack job.

This was once a huge cabinet for media storage that our neighbors
unloaded
generously gave to us. We removed the upper cabinet to make room for the big screen TV which didn't fit in the space. We're thrifty and resourceful.
But along with being ugly, it never really worked all that well either.

The stereo components (
don't laugh, we're old school!)
didn't all fit in there.

I can hear you laughing! A tape deck? Really?

And, when the stereo is playing, the door has to be kept open as it gets pretty hot in there!
One day I just got sick and tired of looking at it and dealing with it
(ever felt that way?
). So my strong, smart friend, Heather & I jumped in the car to go to the
best furniture store on the planet.
to shop for a new one. As many of you know, Ikea is built intentionally like a maze and as you wind your way around like little mice, it is exhausting. The customer service was lacking that day, and I ended up in the warehouse twice looking for the right pieces, which meant I ended up on the second floor twice to get help. I was so grateful for Heather! She caught their design error right away and saved me hours of frustration.
FYI: Bring a friend to help you, plan on wearing really good walking shoes and bring a snack for the ride home.
I chose
for my new cabinet because you can design it for exactly what you need in it, which is an organizer's dream come true
and it has it's own video, so you know it's a rockstar!
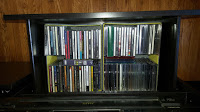
I'd sorted all the music CDs and had my family sort all the DVDs last year, so I knew before shopping the amount of storage I'd need.
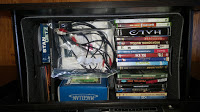
The cassette tapes are another matter entirely.
But since I mentioned it, let's delve in. Cassette tapes are obsolete. I have a stack of them. Not that I want to listen to them as the quality isn't great, but I plan to make a list of the music on them and then upload the songs on to newer technology. There is nothing like hearing a favorite song from long ago and instantly recalling the memory that you had while listening to that song.
Recently, I've read if you get Alzheimer's, they've had a lot of success with
. Keeping my cassette tape music is like having JOY insurance for my old age.
But I digress...
This unit has baskets that slide in and out. They hold a large volume of CDs for both my husband and I.


HERS

HIS
Notice that HERS are neatly labeled on the spines. It only takes a few minutes and is such a time saver when looking for say, Dexy's Midnight Runners
(just kidding although now I have "Come on Eileen" stuck in my head.)

These totes came as part of the BESTA system. They fit perfectly in the drawers and come folded flat in two sizes. No measuring required!


Look how nice and neat they all fit! I even sorted HERS by genre and alphabetized HERS.
My husband has some sorting & labeling to do first.
When organizing, it's very important that all like items are gathered first. I suddenly remembered I had a lot of CDs stored in my car as I found a stack of empty CD cases in the HERS basket.


This car CD organizer is so handy. It attaches with elastic to the windshield visor and then it flips open. When my boys were small, they had one side and I had the other and then ipods were invented...
sigh.

But alas, there was one CD leftover that I couldn't figure out who the artist was.
Any guesses, anyone, anyone?

So in a flash of inspiration, I popped it into the CD player and behold found another 4 CDs!


Remember to check everywhere that like items could be hiding in your house!
It's a good idea to keep a few clear CD cases on hand in case some get broken. Plastic gets brittle as it ages.

The DVDs, which were on a shelf, underneath where the TV was, went into a larger tote, along with the larger CD cases. Can you see the 1/3rd empty space in the middle? It's a goal to always have some empty space and in this case, it was short lived. The remote and some spare cords filled this up very quickly.

So did you guess the mystery artist? As soon as I heard "My Redeemer Lives" I knew right away.

Now I just need help putting my new BESTA together so I can happily install the stereo components and totes. All in good time.
What piece of furniture would you replace if you could?
What's the most ancient piece of technology that you own?
Hello friends!
It's been over a month since I've blogged. I was traveling for a couple of weeks, even helped with an organizing project - more on that later - and then got the dreaded respiratory influenza and was laid up for 3 weeks.
In the meantime, my husband has taken a job in another state and moved into a rental there, while I stay here and fix up our house to eventually sell in a year or two. We actually are loving this temporary separation with visiting privileges.
#revitalizedmarriage
If feels good to be back to work and blogging and well, life in general. Interesting how being sick is like being in some sort of twilight zone where life stops but also life goes on. I am spending this week catching up with everything that was postphoned.
So being sick, I was literally laying around for weeks and my favorite thing to do when I'm too sick to do much else, is to windowshop online. I believe it's called "Internesting" and it's a
.

My favorite stores to visit from my internest are:
I've spent many hours organizing my home over the past year and "winnowing" which is a clever word for discarding/donating/selling many, many things that no longer fit, are needed, have no place, served their use etc.
So it felt just right after my long illness and with spring approaching to refresh my house and spend some quality time "sprucing".
After long hours researching online and really feeling what sparked joy, I headed to the stores and picked out all of this loveliness.
Before I had gold brocade drapes in the dining room and sage green velvet drapes in the living room. The house always felt dark and closed in, which is a cozy feeling in the winter, but I want to live differently now.
I replaced all the drapes with these light and airy linens. The words diaphenous and ethereal come to mind.


When the sun comes out (as it surely will), the light pours in these rooms and I love that I can sit with the drapes closed, have privacy and yet still see out and enjoy the sun!

Yes we have sliding glass doors in our living room that open into an office.
Doesn't everyone?
I dream about installing French doors one day. Instead of heavy drapes covering this doorway and hiding what's behind there, these drapes entice and beckon.
Don't you think?

Next up was the bathroom. Before we had black and gray towels - yes, I said black towels. Being that I lived in a house of men, black and gray made a lot of sense.
Not anymore!
These new towels are different shades of dusky blue and light aqua. I chose different textures and sizes as well. Because JOY.

I splurged and got some new artwork for the walls too.
That cell phone booster with it's winding power cord needs to be moved!

I couldn't resist this spring time visitor with it's perfect bowl for barettes and jewelry.

Then it was on to the master bedroom. I've always wanted lots and lots of pillows as I often like to spend time reading and writing in bed with a hot cup of tea.

This bedding is so girly and fun!. I brought home all the pillows, chose these 3 and returned the rest.

The floor rug has a lot of textured loops and memory foam. If you haven't tried memory foam under your feet, I highly recommend it.
Finally, I had to add this turtle to my side entry.

It's a little reminder to take things slowly.

Sprucing doesn't have to involve a big project or be expensive. It can just be adding a small detail to your space that makes you smile.
This spring, what's on your spruce list?
Going cabin crazy yet? It's a real thing here in snowy, northern Wisconsin where I live. Every winter I read in the newspaper about some guy going cabin crazy and hacking up his wife and sticking her in the freezer or some such horror. No lie.
I always wonder what living in their house was like?

I imagine there was a lot of clutter.
It's touted that living in clutter can be disturbing, but will it lead you to kill someone? Probably not, but for some of us it does have serious psychological ramifications. This article in
by Sherrie Bourg Carter, Psy.D says it best.
"
Messy homes and work spaces leave us feeling anxious, helpless, and overwhelmed."
I don't know about you, but I'd rather feel
calm, empowered and joyful
as I go about my day.
So what can be done? Once a week, hold a
Discarding Day
.
Pick a day, put it on your calendar
repeating for the entire year.
When that day arrives, pick one type of item from the following list to discard and go to it.
At the end of the year, you'll have discarded 52 types of items in your home and it will only have taken you minutes each week.
It goes fast. Promise.
The Discarding Day List*
Phonebooks
Old condiment packets
Old maps
Old fire extinguishers
Manuals to items you no longer own
Bags you no longer use (tote bags, plastic grocery bags, purses etc.)
Old hair accessories
Old dish sponge
Broken flashlights
Expired canned food
Old pillows
Newspapers, magazines and books never read
Old sunscreen
Broken umbrellas
Puzzles with missing pieces
Scarves never worn
Junk mail
Gifts you don't like
Suitcases you no longer use
Your toothbrush (buy new)
Expired coupons
Old greenting, holday and birthday cards
Old pots and pans
Clothes you've never worn
Broken jewelry
Old bed linens
Dead batteries (dispose of properly)
Candle holders
Recipe books never used
Worn out shoes
Mismatched plastic containers
Ink-less markers
Gifts/letters your ex gave you
Trial sized cosmetics/hotel samples
Games you never play
Wire or dry cleaning hangers
Old electronic cords/accessories
Old children's artwork
Old undergarments
Broken glasses/sunglasses
Broken items you'll never fix
Old phones/phone cases/phone accessories
Outgrown baby/kid clothes
Unused wedding gifts
Old schoolwork papers
Perfume/colonge you don't like
Broken crayons
Scraps of wrapping paper/ribbons/bows
Expired make-up
Old spices
Unmatched and holey socks
Torn towels
*This list was adapted from
Now that's what I call, PROGRESS.

Quick, start today! Choose peace, calmness and joy.
I don't want to read about you in the newspaper.
Is anyone's clutter making you crazy?
What's the first thing you'll discard from the list?
A few months ago I blogged about manuals & warranties and how to keep them organized with this
After I wrote it, I put together my own manual and upon completion, took it one step further, based on a great tip that I learned from a client,
which I'll share later in this post.
If you've been putting this organizational task off, but would still like to do it. You can follow along here, step by step.
First, gather up all of your manuals & warranties, along with a 1 1/2 inch binder and lots of clear plastic sleeves. If you have more manuals then can fit in one binder, you can certainly use 2 or 3.

As you can see, most of mine were in folders, filed away in the filing cabinet. The idea as that if something goes wrong, one can easily locate the binder and all of the information you
(or the repair person)
needs is at your fingertips.
By compiling them in a binder, makes the manual easy to find if you decide to sell the machine and if you ever sell your home, the buyers will love you!
Manuals you'll want to include are: Dishwasher, Refrigerator, Stove, Microwave, Garbage Disposal, Washer, Dryer, Water Heater, Water Softener, Freezer, Humidifier, Air Conditioner, Thermostat, Fans & Lighting,
I even included the Compost Bin!

The cover doesn't have to be anything fancy, and be sure to label the spine.
You'll see why at the end of this post.
If you use a binder with a clear sleeve, you can simply type up an index and slip it in
.

Then it's a matter of simply slipping each manual & warranty into a sleeve. I placed mine alphabetically, but if you're using more than one binder, you may want to place them by category such as one binder for the kitchen, one for the basement, etc.

After that step is complete, it's a good idea to make tabs so it's easier to locate each manual. You could use something like
. Or
if you're like me
, use what you have.

I used a very thin sharpie to write the name of each machine on the tab.

After it was completed, we purchased a new humidifier, so I just wrote it in on the cover and added it to the book. No need for perfection here.
Then I decided to take things a step further...
One of my clients told me that now that she's organized her warranties, she logs the expiration dates into her online calendar. Then as that date approaches, she evaluates how the machine is working to decide whether to contact the company or not about a repair or replacement.
Brilliant!
At our house we're always kicking ourselves that the warranty has already expired - usually within a few months of us taking action on a glitch or a break. Always too late.
So, I used this
and logged in all of the information for each machine. But, it didn't take very long as all of the warranties require a receipt!
Of course our receipts for most of these purchases are long gone or the warranties had long expired.
Here's to long living machines and a new practice of filing the receipt with the manual & warranty from now on.
I did find the receipt to the water heater though....25 years old.
Not good.
When I went to put the binder back in the filing cabinet...
uh oh, forgot to measure.

So I tried it this way.

That just takes up SO much room for potential files!

In the end it went here, next to our books on home remodeling in our "library". I've easily located it 2 or 3 times since it was placed. Place yours where it makes the most sense. Like with like.

Color coding books makes for a restful space.
It's easy to create a separate calendar just for appliances in your online calendar program. Remember the final step of logging in your warranty expiration dates!
What is the oldest appliance in your home?
Would replacing it save you time or money?